StructViz3D Documentation
StructViz3D Documentation
Introduction
StructViz3D is a powerful web-based 3D model viewer specifically designed for visualizing structural engineering models. The application allows engineers, architects, and designers to upload, view, and interact with 3D models in a browser environment, eliminating the need for specialized desktop software.
This documentation provides a comprehensive overview of the entire StructViz3D application, covering its architecture, components, features, and implementation details. Whether you’re a user looking to understand the application’s capabilities or a developer planning to extend the platform, this guide will provide all the necessary information.
Project Overview
StructViz3D is built as a modern web application using React for the frontend and Three.js for 3D rendering. It supports multiple 3D file formats including STL and GLTF, making it versatile for different types of structural models.
Key features include:
- Interactive 3D model visualization
- Support for STL and GLTF file formats
- Orthographic and perspective camera modes
- Advanced control options (rotation, pan, zoom)
- Customizable model appearance (colors, wireframe)
- Multiple grid systems for precise measurements
- Lighting controls for optimal model visualization
- Keyboard shortcuts for efficient workflow
- Fullscreen mode for detailed examination
- Responsive design for different screen sizes
The application is designed with a focus on performance, usability, and extensibility, making it suitable for professional use in structural engineering and related fields.
Architecture
StructViz3D follows a component-based architecture using React. The application is structured around these main architectural elements:
Core Application Layer: Managed by the App component, handling the overall application state and user interface.
File Handling Layer: Responsible for uploading and processing 3D model files.
Rendering Engine: Based on Three.js, this layer handles all 3D rendering tasks including scene setup, camera management, and rendering loop.
Control System: A set of components that provide the user interface for interacting with the 3D model.
Utility Managers: Specialized manager classes for camera state, lighting, view presets, and other cross-cutting concerns.
This layered approach ensures separation of concerns, making the codebase more maintainable and extensible. Components communicate primarily through props and callbacks, with some specialized managers maintaining their own state for complex features.
Core Components
App Component
The App component serves as the entry point and main container for the StructViz3D application. It manages the high-level application state and orchestrates the interaction between various components.
Key responsibilities:
- Managing application state (upload screen vs. viewer screen)
- Handling model URL and binary URL state
- Coordinating file uploads and model loading
- Providing the sample model functionality
- Managing the overall UI layout and transitions
Implementation details:
1
2
3
4
5
6
7
8
9
10
11
12
13
14
15
16
17
18
19
function App() {
    const [modelUrl, setModelUrl] = useState(null);
    const [binUrl, setBinUrl] = useState(null);
    const [isLoading, setIsLoading] = useState(false);
    const [showUploadScreen, setShowUploadScreen] = useState(true);

    // Handler for model loading
    const handleModelLoad = (data) => {
        setIsLoading(true);
        const apiBaseUrl = import.meta.env.VITE_APP_API_URL || '';
        const modelUrl = `${apiBaseUrl}${data.download_url}`;
        const binUrl = data.bin_url ? `${apiBaseUrl}${data.bin_url}` : null;
        setModelUrl(modelUrl);
        setBinUrl(binUrl);
        setShowUploadScreen(false);
    };

    // Other handlers and UI rendering...
}
The App component uses conditional rendering to switch between the upload screen and the viewer screen based on the application state. When a model is loaded, it transitions to the viewer screen and passes the model URL to the ModelViewer component.
Model Viewer
The ModelViewer component is the heart of the application, responsible for rendering and interacting with 3D models. It integrates with Three.js to create a fully functional 3D viewer with advanced capabilities.
Key responsibilities:
- Setting up the Three.js scene, camera, and renderer
- Loading and displaying 3D models (STL and GLTF)
- Managing user interactions (orbit, pan, zoom)
- Handling camera modes and controls
- Implementing visual features (wireframe, grid, color)
- Coordinating with various control components
The ModelViewer component is implemented as a functional component with hooks, managing a complex state and numerous side effects for 3D rendering and interaction.
File Upload
The FileUpload component handles the uploading of 3D model files. While not fully shown in the provided code snippets, its role is to:
- Provide a file selection interface
- Validate uploaded files
- Process and prepare files for viewing
- Pass the resulting model URL to the parent component
3D Rendering Engine
Three.js Integration
StructViz3D leverages Three.js, a powerful JavaScript 3D library, to handle all aspects of 3D rendering. The integration is primarily managed within the ModelViewer component.
Key aspects of Three.js integration:
- Scene creation and management
- Camera setup (perspective and orthographic)
- WebGL renderer configuration
- Model loading and processing
- Lighting and shadow setup
- Control systems (OrbitControls)
- Animation loop management
The application uses modern Three.js features, including:
- SRGBColorSpace for correct color rendering
- PCFSoftShadowMap for realistic shadows
- ACESFilmicToneMapping for improved visual quality
- High-quality antialiasing for smooth edges
Model Loading
StructViz3D supports multiple 3D file formats through specialized loaders:
- STL Loader: For loading STL (STereoLithography) files commonly used in CAD and 3D printing.
1
2
3
4
5
6
7
8
9
10
11
12
13
14
15
16
17
18
19
20
21
const loadSTLModel = useCallback((url, scene, onSuccess, onProgress, onError) => {
    const loader = new STLLoader();
    loader.load(
        url,
        (geometry) => {
            // Create material and mesh
            const material = new THREE.MeshStandardMaterial({
                color: new THREE.Color(modelColor),
                roughness: 0.7,
                metalness: 0.3
            });
            const model = new THREE.Mesh(geometry, material);

            // Setup model in scene
            setupModel(model, scene);
            onSuccess(model);
        },
        onProgress,
        onError
    );
}, [setupModel]);
- GLTF Loader: For loading GLTF (GL Transmission Format) files, which are more complex models that can include materials, textures, and animations.
1
2
3
4
5
6
7
8
9
10
11
12
13
14
15
16
17
18
19
20
21
22
23
24
25
const loadGLTFModel = useCallback((url, scene, onSuccess, onProgress, onError) => {
    const loader = new GLTFLoader();
    // Set resource path for associated files
    const resourcePath = url.substring(0, url.lastIndexOf('/') + 1);
    loader.setResourcePath(resourcePath);

    loader.load(
        url,
        (gltf) => {
            const model = gltf.scene;
            setupModel(model, scene);

            // Apply materials and settings to all meshes
            model.traverse((child) => {
                if (child.isMesh) {
                    // Configure material properties
                }
            });

            onSuccess(model);
        },
        onProgress,
        onError
    );
}, [setupModel]);
The loading process includes progress tracking and error handling to provide feedback to the user during the loading process.
Scene Management
The scene management system in StructViz3D handles the organization and rendering of all 3D elements. It includes:
- Scene Setup: Creating and configuring the Three.js scene
1
2
3
const scene = new THREE.Scene();
scene.background = new THREE.Color(BG_COLOR);
sceneRef.current = scene;
- Model Positioning: Centering and scaling models appropriately
1
2
3
4
5
6
7
8
9
10
11
12
13
14
15
16
17
18
19
20
21
22
23
24
const setupModel = useCallback((model, scene) => {
    modelRef.current = model;

    // Create and add group
    const modelGroup = new THREE.Group();
    scene.add(modelGroup);
    modelGroup.add(model);
    modelGroupRef.current = modelGroup;

    // Center model
    const box = new THREE.Box3().setFromObject(model);
    const center = box.getCenter(new THREE.Vector3());
    model.position.set(-center.x, -center.y, -center.z);

    // Scale model
    const size = box.getSize(new THREE.Vector3());
    const maxDim = Math.max(size.x, size.y, size.z);
    if (maxDim > 0) {
        const scale = DEFAULT_SCALE_FACTOR / maxDim;
        modelGroup.scale.set(scale, scale, scale);
    }

    return { box, size, center, maxDim };
}, []);
- Helper Elements: Adding axes helpers for orientation
1
2
3
const axesHelper = new THREE.AxesHelper(5);
axesHelper.position.y = 0;
scene.add(axesHelper);
- Render Loop: Creating an efficient animation loop for continuous rendering
1
2
3
4
5
6
7
const animate = () => {
    animationFrameIdRef.current = requestAnimationFrame(animate);
    if (controlsRef.current) controlsRef.current.update();
    if (rendererRef.current && sceneRef.current && currentCameraRef.current) {
        rendererRef.current.render(sceneRef.current, currentCameraRef.current);
    }
};
- Resource Management: Properly cleaning up resources when components unmount or models change
1
2
3
4
5
const cleanupResources = useCallback(() => {
    // Dispose of geometries, materials, textures
    // Clean up scene elements
    // Cancel animations
}, []);
This comprehensive scene management ensures optimal performance and visual quality throughout the application lifecycle.
Camera System
Camera Modes
StructViz3D provides two different camera modes to accommodate different visualization needs:
- Perspective Camera: The default mode, providing a natural perspective view similar to human vision. Objects appear smaller as they get further away.
1
2
3
4
5
6
7
const perspCamera = new THREE.PerspectiveCamera(
    75,
    container.clientWidth / container.clientHeight,
    0.1,
    1000
);
perspCamera.position.set(5, 5, 5);
- Orthographic Camera: An alternative mode that removes perspective distortion, making it easier to compare sizes and dimensions. This mode is particularly useful for technical and engineering visualizations.
1
2
3
4
5
6
7
8
9
10
const aspect = container.clientWidth / container.clientHeight;
const frustumSize = 10;
const camera = new THREE.OrthographicCamera(
    frustumSize * aspect / -2,
    frustumSize * aspect / 2,
    frustumSize / 2,
    frustumSize / -2,
    0.1,
    1000
);
Users can toggle between these camera modes using the camera controls in the UI. The system preserves position and orientation when switching between modes for a seamless experience.
Camera Controls
The camera control system is built on Three.js OrbitControls, providing intuitive interaction with the 3D scene:
1
2
3
4
5
6
7
8
9
10
11
12
13
const controls = new OrbitControls(perspCamera, renderer.domElement);
controls.enableDamping = true;
controls.dampingFactor = 0.25;
controls.enableZoom = true;
controls.enablePan = true;
controls.panSpeed = 0.8;
controls.zoomSpeed = 1.0;
controls.rotateSpeed = 0.8;
controls.mouseButtons = {
    LEFT: THREE.MOUSE.ROTATE,
    MIDDLE: THREE.MOUSE.DOLLY,
    RIGHT: THREE.MOUSE.PAN
};
These controls allow users to:
- Rotate the camera around the model (default left mouse button)
- Pan the view (right mouse button or drag mode)
- Zoom in and out (mouse wheel or dedicated controls)
The controls are configured with carefully tuned parameters for smooth and intuitive interaction.
Camera State Management
The application includes a sophisticated camera state management system through the cameraStateManager utility. This manager:
- Maintains synchronization between perspective and orthographic cameras
- Preserves camera positions and orientations when switching modes
- Handles camera reset and view presets
- Adjusts camera parameters based on model size
1
2
3
4
5
6
cameraStateManager.initialize(
    perspectiveCameraRef.current,
    orthographicCameraRef.current,
    controlsRef.current,
    getModelSize()
);
The camera state manager ensures a consistent and intuitive camera experience throughout different interaction modes and view changes.
Visualization Features
Wireframe Mode
Wireframe mode renders the model as a mesh of lines, making it easier to see the underlying structure and geometry:
1
2
3
4
5
6
7
8
9
10
11
12
13
14
15
16
17
18
19
20
21
22
23
24
25
26
27
28
const toggleWireframe = useCallback(() => {
    const newWireframeState = !isWireframe;
    setIsWireframe(newWireframeState);

    if (modelRef.current) {
        modelRef.current.traverse((child) => {
            if (child.isMesh) {
                if (Array.isArray(child.material)) {
                    child.material.forEach(material => {
                        material.wireframe = newWireframeState;
                        if (newWireframeState) {
                            material.wireframeLinewidth = 2;
                            material.wireframeLinecap = 'round';
                            material.wireframeLinejoin = 'round';
                        }
                    });
                } else if (child.material) {
                    child.material.wireframe = newWireframeState;
                    if (newWireframeState) {
                        child.material.wireframeLinewidth = 2;
                        child.material.wireframeLinecap = 'round';
                        child.material.wireframeLinejoin = 'round';
                    }
                }
            }
        });
    }
}, [isWireframe]);
The wireframe mode can be toggled on and off, and includes styling options like line width and caps for improved visibility.
Enhanced Wireframe
In addition to the standard wireframe mode, StructViz3D includes an enhanced wireframe mode through the EnhancedWireframeMode utility. This provides a more sophisticated wireframe visualization, potentially with features like:
- Better line visibility
- Silhouette edge highlighting
- “Pencil sketch” rendering style
1
EnhancedWireframeMode.applyPencilView(sceneRef.current, rendererRef.current, currentCameraRef.current, false);
This advanced wireframe rendering is particularly useful for architectural and design presentations where aesthetic quality is important.
Color Management
StructViz3D includes a color management system that allows users to customize the model’s appearance:
1
2
3
4
5
6
7
8
9
10
11
12
13
14
15
16
17
18
19
20
21
22
const updateModelColor = useCallback((color) => {
    // Update the state
    setModelColor(color);

    // Use the utility function to update the model material
    ViewerControlsUtils.updateModelColor(color, modelRef);

    // Re-apply wireframe if it's enabled
    if (isWireframe && modelRef.current) {
        modelRef.current.traverse((child) => {
            if (child.isMesh) {
                if (Array.isArray(child.material)) {
                    child.material.forEach(material => {
                        material.wireframe = true;
                    });
                } else if (child.material) {
                    child.material.wireframe = true;
                }
            }
        });
    }
}, [isWireframe]);
The color management system works with both solid and wireframe rendering modes, preserving other material properties like roughness and metalness.
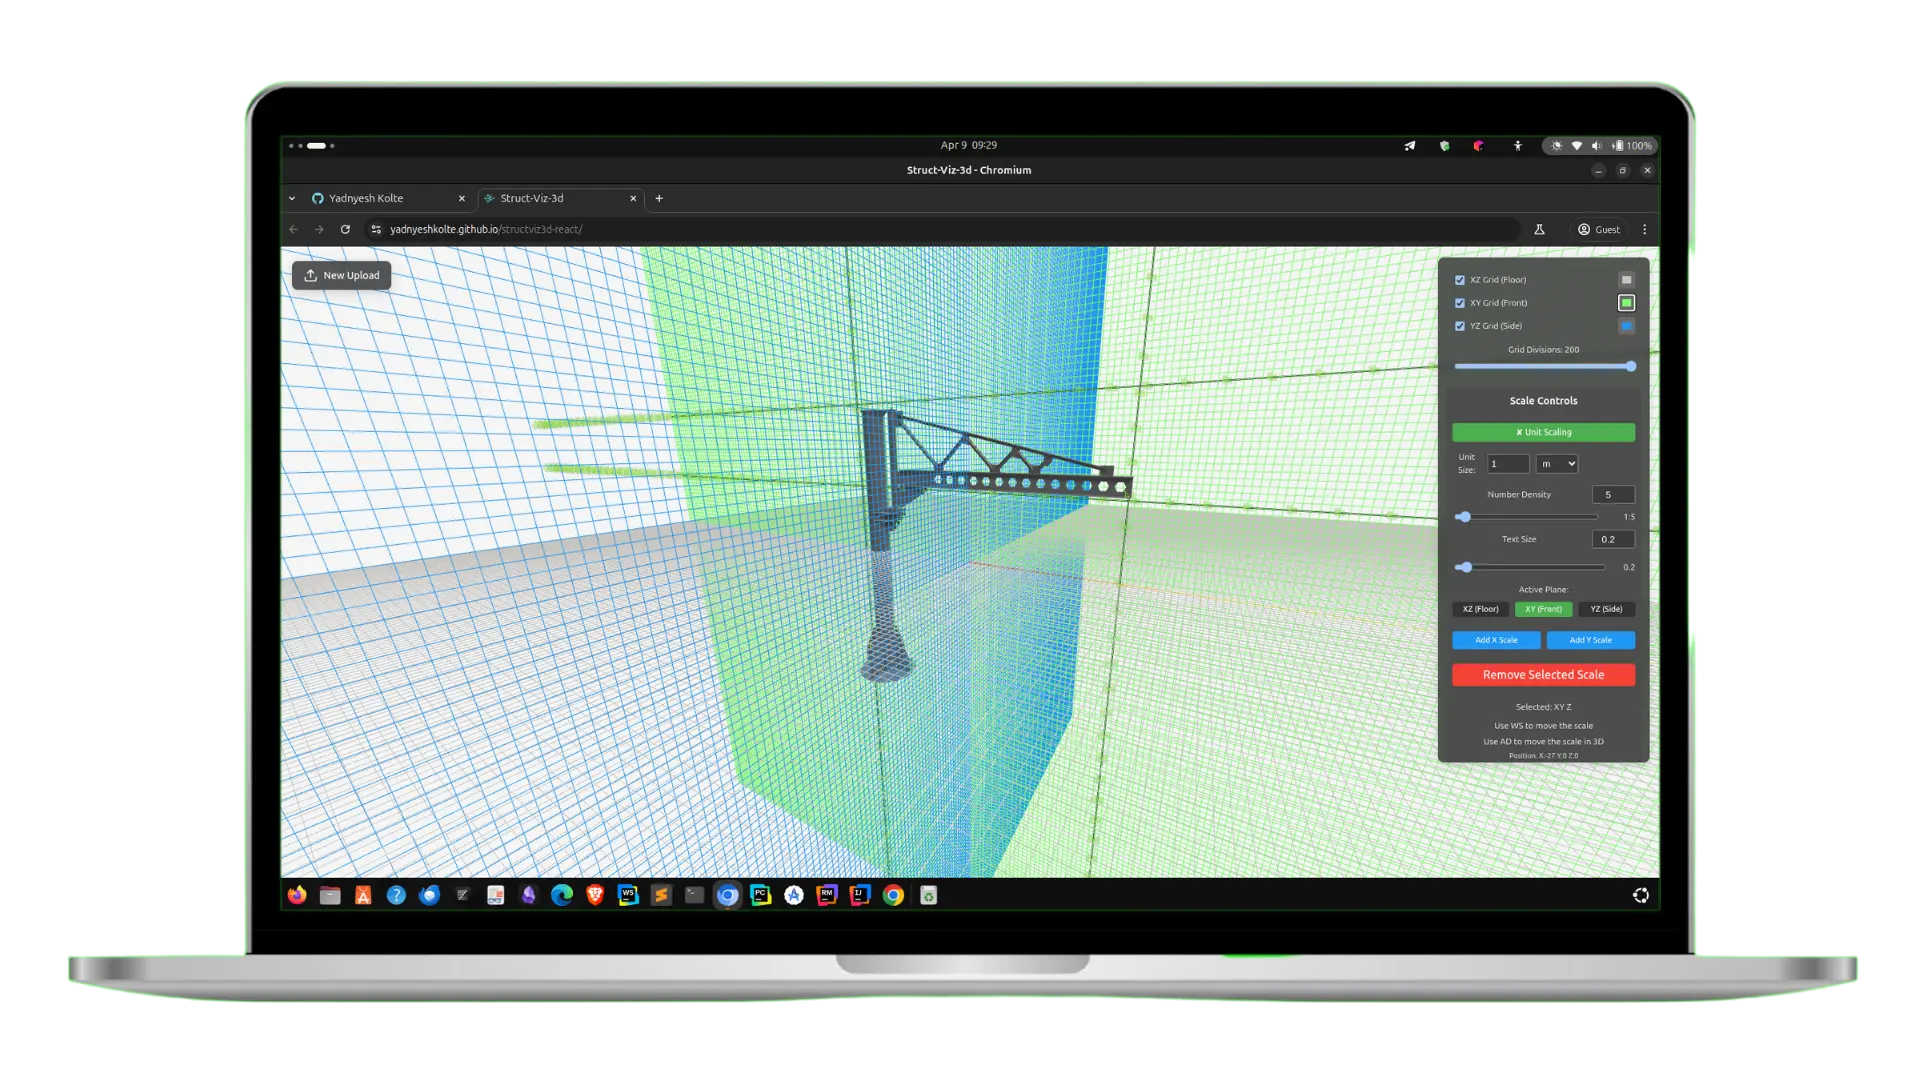
Grid Systems
To aid in spatial understanding and measurement, StructViz3D provides three different grid systems that can be toggled independently:
- XZ Grid: The horizontal ground plane grid (default)
- XY Grid: Vertical grid along the Y-axis
- YZ Grid: Vertical grid along the Z-axis
Each grid can be independently toggled and customized:
1
2
3
4
5
6
7
8
9
10
11
const toggleXZGrid = useCallback(() => {
    setShowXZGrid(prev => !prev);
}, []);

const toggleXYGrid = useCallback(() => {
    setShowXYGrid(prev => !prev);
}, []);

const toggleYZGrid = useCallback(() => {
    setShowYZGrid(prev => !prev);
}, []);
Grid customization options include:
- Grid color
- Number of divisions
- Grid size
The grid systems help users understand the scale and orientation of the model, as well as provide reference points for measurements.
Lighting System
Default Lighting Setup
StructViz3D implements a sophisticated lighting system to enhance model visibility and detail. The lighting setup is managed through the lightingManager utility:
1
2
3
const setupLighting = useCallback((scene) => {
    return lightingManager.setupLighting(scene);
}, []);
The default lighting setup likely includes:
- Ambient light for overall illumination
- Directional lights for shadows and highlights
- Hemisphere light for natural environment lighting
- Point or spot lights for specific highlighting
This comprehensive lighting system ensures models are well-lit from all angles while maintaining realistic shadows and highlights.
Lighting Controls
The application includes lighting controls through the LightingControls component:
1
<LightingControls scene={sceneRef.current} />
These controls allow users to customize the lighting setup, potentially including:
- Light intensity adjustment
- Light color customization
- Light position control
- Shadow quality settings
- Environment lighting options
The lighting controls help users achieve the optimal visualization for their specific model and purpose, whether technical analysis or presentation.
User Interface
Viewer Controls
The main viewer controls are implemented through the ViewerControls component, which provides a central hub for all interaction controls:
1
2
3
4
5
6
7
8
9
10
11
12
13
14
<ViewerControls
    isFullscreen={isFullscreen}
    toggleFullscreen={toggleFullscreen}
    visible={controlsVisible}
    locked={controlsLocked}
    onToggleLock={toggleControlsLock}
    onToggleShortcuts={toggleShortcuts}
    onZoomIn={handleZoomIn}
    onZoomOut={handleZoomOut}
    dragModeEnabled={dragModeEnabled}
    toggleDragMode={toggleDragMode}
>
    {/* Child control components */}
</ViewerControls>
This component serves as a container for various specialized control panels, manages the visibility and positioning of controls, and handles core viewer functionality like fullscreen toggling and zoom controls.
Control Panel
The control panel is a collection of specialized control components, each focused on a specific aspect of the visualization:
- ColorSelector: For changing the model color
1
2
3
4
<ColorSelector
    currentColor={modelColor}
    onColorChange={updateModelColor}
/>
- CameraControls: For switching between perspective and orthographic cameras
1
2
3
4
<CameraControls
    isOrthographic={isOrthographic}
    toggleCameraMode={toggleCameraMode}
/>
- ViewControls: For preset views and camera positioning
1
2
3
4
5
6
7
8
<ViewControls
    cameraManager={cameraStateManager}
    currentCamera={currentCameraRef.current}
    controls={controlsRef.current}
    modelRef={modelRef}
    isOrthographic={isOrthographic}
    setAnimating={setAnimating}
/>
- GridControls: For customizing the reference grids
1
2
3
4
5
6
7
8
9
10
11
12
13
14
15
16
17
<GridControls
    scene={sceneRef.current}
    showXZGrid={showXZGrid}
    showXYGrid={showXYGrid}
    showYZGrid={showYZGrid}
    gridDivisions={gridDivisions}
    xzGridColor={xzGridColor}
    xyGridColor={xyGridColor}
    yzGridColor={yzGridColor}
    onToggleXZGrid={toggleXZGrid}
    onToggleXYGrid={toggleXYGrid}
    onToggleYZGrid={toggleYZGrid}
    onGridDivisionsChange={handleGridDivisionsChange}
    onXZGridColorChange={handleXZGridColorChange}
    onXYGridColorChange={handleXYGridColorChange}
    onYZGridColorChange={handleYZGridColorChange}
/>
- OrientationControls: For model orientation
1
2
3
4
<OrientationControls
    modelGroup={modelGroupRef.current}
    resetOrientation={resetModelOrientation}
/>
- WireframeControls: For wireframe visualization options
1
2
3
4
5
6
7
8
<WireframeControls
    modelRef={modelRef}
    isWireframe={isWireframe}
    toggleWireframe={toggleWireframe}
    scene={sceneRef.current}
    renderer={rendererRef.current}
    currentCamera={currentCameraRef.current}
/>
Each control panel is focused on a specific aspect of the visualization, providing an intuitive and organized interface for adjusting various settings.
Keyboard Shortcuts
StructViz3D includes keyboard shortcuts for efficient workflow through the KeyboardShortcuts component:
1
2
3
4
<KeyboardShortcuts
    isVisible={shortcutsVisible}
    onClose={() => setShortcutsVisible(false)}
/>
This component likely provides both a visual reference for available keyboard shortcuts and the implementation of those shortcuts. Common shortcuts might include:
- View orientation presets (top, front, side)
- Toggle wireframe mode
- Toggle grid visibility
- Reset view
- Zoom to fit
- Toggle fullscreen
The keyboard shortcuts allow power users to navigate and adjust the visualization quickly without relying on mouse interactions with the UI.
Interaction Modes
Rotation Mode
The default interaction mode allows users to rotate the camera around the model:
1
2
3
4
5
controls.mouseButtons = {
    LEFT: THREE.MOUSE.ROTATE,
    MIDDLE: THREE.MOUSE.DOLLY,
    RIGHT: THREE.MOUSE.PAN
};
In this mode, the left mouse button rotates the camera around the focal point, providing an intuitive way to examine the model from different angles.
Drag Mode
An alternative interaction mode changes the left mouse button behavior to panning instead of rotation:
1
2
3
4
5
6
7
8
9
10
11
12
13
14
const toggleDragMode = useCallback(() => {
    const newDragMode = !dragModeEnabled;
    setDragModeEnabled(newDragMode);

    if (controlsRef.current) {
        if (newDragMode) {
            // Switch to drag/pan mode
            controlsRef.current.mouseButtons.LEFT = THREE.MOUSE.PAN;
        } else {
            // Switch back to rotation mode
            controlsRef.current.mouseButtons.LEFT = THREE.MOUSE.ROTATE;
        }
    }
}, [dragModeEnabled]);
This mode is particularly useful when precise positioning of the model in the view is required.
Zoom Functionality
StructViz3D implements an advanced zoom system that can target specific parts of the model:
1
2
3
4
5
6
7
8
9
10
11
12
13
14
15
16
17
18
19
20
21
22
23
24
25
26
27
28
29
30
31
32
33
34
35
36
37
38
const handleZoom = useCallback((event) => {
    event.preventDefault();

    if (!controlsRef.current || !currentCameraRef.current || !container) return;

    // Get mouse position in normalized device coordinates
    const rect = container.getBoundingClientRect();
    const x = ((event.clientX - rect.left) / container.clientWidth) * 2 - 1;
    const y = -((event.clientY - rect.top) / container.clientHeight) * 2 + 1;

    // Create raycaster and find intersection point with model
    const raycaster = new THREE.Raycaster();
    raycaster.setFromCamera(new THREE.Vector2(x, y), currentCameraRef.current);

    // Check for intersections with model
    const intersects = raycaster.intersectObject(modelRef.current, true);

    if (intersects.length > 0) {
        // Get zoom delta and direction
        const zoomDelta = event.deltaY * -0.001;  // Adjust sensitivity here

        // Calculate target position (the intersection point)
        const targetPos = intersects[0].point;

        // Move camera along the direction toward/away from the intersection point
        const cameraPos = currentCameraRef.current.position;
        const direction = new THREE.Vector3().subVectors(targetPos, cameraPos).normalize();
        const distance = direction.multiplyScalar(zoomDelta * 10);

        currentCameraRef.current.position.add(distance);
        controlsRef.current.update();
    } else {
        // Fallback to default OrbitControls zoom
        const zoomDelta = event.deltaY * 0.001;
        controlsRef.current.zoom(Math.pow(0.95, -zoomDelta));
        controlsRef.current.update();
    }
}, [container]);
This zoom functionality tries to zoom toward the point under the mouse cursor when possible, providing a more intuitive zoom experience. If no model point is found, it falls back to standard zoom behavior.
Additional zoom controls are provided through dedicated buttons:
1
2
3
4
5
6
7
8
9
10
11
12
13
14
15
16
17
const handleZoomIn = useCallback(() => {
    ViewerControlsUtils.handleZoomIn(
        isOrthographic,
        orthographicCameraRef,
        currentCameraRef,
        controlsRef
    );
}, [isOrthographic]);

const handleZoomOut = useCallback(() => {
    ViewerControlsUtils.handleZoomOut(
        isOrthographic,
        orthographicCameraRef,
        currentCameraRef,
        controlsRef
    );
}, [isOrthographic]);
These functions handle zoom differently based on the current camera mode (perspective or orthographic).
Model Orientation
Initial Orientation
When a model is first loaded, StructViz3D automatically sets an optimal initial view:
1
2
3
4
5
6
7
8
9
10
const setOptimalInitialView = useCallback((model) => {
    if (!model || !cameraRef.current || !controlsRef.current || initialPositionSet) {
        return;
    }

    const success = viewManager.setOptimalInitialView(model, cameraRef.current, controlsRef.current);
    if (success) {
        setInitialPositionSet(true);
    }
}, [initialPositionSet]);
This function uses the viewManager utility to analyze the model and determine the best initial camera position and orientation. The view is optimized to show the model clearly and completely within the viewport.
Orientation Controls
The application includes dedicated orientation controls through the OrientationControls component:
1
2
3
4
<OrientationControls
    modelGroup={modelGroupRef.current}
    resetOrientation={resetModelOrientation}
/>
These controls allow users to:
- Reset the model to its original orientation
- Rotate the model to standard views (top, front, side, etc.)
- Fine-tune the model orientation
The reset functionality is implemented as:
1
2
3
4
5
6
7
8
9
10
11
12
const resetModelOrientation = useCallback(() => {
    if (modelGroupRef.current) {
        // Reset the rotation
        modelGroupRef.current.rotation.set(0, 0, 0);

        // After resetting orientation, we may want to update the controls target
        // to ensure the camera is still focused correctly
        if (controlsRef.current) {
            controlsRef.current.update();
        }
    }
}, []);
This reset function ensures the model returns to its original orientation while maintaining the camera’s focus on the model.
Resource Management
Loading Optimization
StructViz3D implements several optimizations for model loading:
- Progress Tracking: Providing feedback during the loading process
1
2
3
4
(xhr) => {
    const progress = xhr.total ? (xhr.loaded / xhr.total) * 100 : 0;
    console.log(`${progress.toFixed(2)}% loaded`);
}
- Error Handling: Graceful error handling for failed loads
1
2
3
4
5
(error) => {
    console.error('Error loading model:', error);
    setError('Failed to load the model. Please try again.');
    setLoading(false);
}
- Resource Path Management: Setting the correct path for associated resources
1
2
const resourcePath = url.substring(0, url.lastIndexOf('/') + 1);
loader.setResourcePath(resourcePath);
These optimizations ensure efficient and reliable model loading, even for complex models or slower network connections.
Resource Management
Loading Optimization
StructViz3D implements several strategies to optimize the loading of 3D models, ensuring smooth user experience even with complex structural models:
1. Progressive Loading
The application utilizes a progressive loading approach, providing visual feedback during the loading process:
1
2
3
4
5
6
7
8
9
10
11
12
13
14
15
16
17
18
19
// Progress tracking during model loading
loader.load(
    url,
    (geometry) => {
        // Success callback
        // Model creation and setup happens here
    },
    (xhr) => {
        // Progress callback
        const progress = xhr.total ? (xhr.loaded / xhr.total) * 100 : 0;
        console.log(`${progress.toFixed(2)}% loaded`);
    },
    (error) => {
        // Error callback
        console.error('Error loading model:', error);
        setError('Failed to load the model. Please try again.');
        setLoading(false);
    }
);
This implementation provides real-time progress updates during model loading, allowing users to understand the loading status of large models.
2. Asynchronous Loading
All model loading operations are performed asynchronously to prevent blocking the main UI thread:
1
2
3
4
5
6
7
8
9
10
11
12
13
// Asynchronous model loading pattern
const loadSTLModel = useCallback((url, scene, onSuccess, onProgress, onError) => {
    const loader = new STLLoader();
    loader.load(
        url,
        (geometry) => {
            // Process geometry and create mesh
            onSuccess(model);
        },
        onProgress,
        onError
    );
}, [setupModel, modelColor, isWireframe]);
This pattern ensures the application remains responsive during loading operations, particularly important for large models that might take longer to process.
3. Resource Path Management
For GLTF models that may reference external resources, the application intelligently sets resource paths:
1
2
3
// Set resource path for associated files
const resourcePath = url.substring(0, url.lastIndexOf('/') + 1);
loader.setResourcePath(resourcePath);
This ensures that textures, materials, and other dependencies are properly resolved relative to the model file location.
4. Loading States
The UI provides clear visual indicators of loading states:
1
2
3
4
5
6
{loading && (
    <div className="loading-overlay">
        <div className="spinner"></div>
        <p>Loading model...</p>
    </div>
)}
This feedback mechanism helps users understand when the system is processing data, improving the perceived performance and user experience.
Memory Management
Effective memory management is crucial for a 3D visualization tool, especially when dealing with complex structural models. StructViz3D implements several techniques to optimize memory usage:
1. Resource Disposal
The application properly disposes of Three.js resources when they’re no longer needed:
1
2
3
4
5
6
7
8
9
10
11
12
13
14
15
16
17
18
19
20
21
22
23
24
// Clean up resources
const cleanupResources = useCallback(() => {
    // Dispose of the model
    if (modelRef.current) {
        modelRef.current.traverse((child) => {
            if (child.isMesh) {
                if (child.geometry) {
                    child.geometry.dispose();
                }
                if (Array.isArray(child.material)) {
                    child.material.forEach(material => {
                        if (material.map) material.map.dispose();
                        material.dispose();
                    });
                } else if (child.material) {
                    if (child.material.map) child.material.map.dispose();
                    child.material.dispose();
                }
            }
        });
    }

    // Additional cleanup operations...
});
This systematic disposal of geometries, materials, and textures prevents memory leaks that could otherwise accumulate and degrade performance.
2. Reference Management
The application carefully manages object references using React’s useRef hook:
1
2
3
4
5
6
7
8
// Refs for Three.js objects
const sceneRef = useRef(null);
const modelRef = useRef(null);
const rendererRef = useRef(null);
const lightsRef = useRef([]);
const controlsRef = useRef(null);
const cameraRef = useRef(null);
// Additional refs...
This approach ensures that Three.js objects aren’t unnecessarily recreated during React’s rendering cycles, minimizing both memory usage and GC pressure.
3. Model Optimization
When loading models, StructViz3D applies optimization techniques to balance visual quality and memory usage:
1
2
3
4
5
6
7
8
9
10
11
12
13
14
15
16
17
18
19
20
21
22
23
24
25
// Model setup with optimization
const setupModel = useCallback((model, scene) => {
    modelRef.current = model;

    // Create and add group
    const modelGroup = new THREE.Group();
    scene.add(modelGroup);
    modelGroup.add(model);
    modelGroupRef.current = modelGroup;

    // Center model
    const box = new THREE.Box3().setFromObject(model);
    const center = box.getCenter(new THREE.Vector3());
    model.position.set(-center.x, -center.y, -center.z);

    // Scale model appropriately
    const size = box.getSize(new THREE.Vector3());
    const maxDim = Math.max(size.x, size.y, size.z);
    if (maxDim > 0) {
        const scale = DEFAULT_SCALE_FACTOR / maxDim;
        modelGroup.scale.set(scale, scale, scale);
    }

    return { box, size, center, maxDim };
}, []);
This optimization ensures models are properly scaled and centered, improving rendering efficiency and memory usage for various model sizes.
4. Cancellation of Animations
The application properly cancels animation frames when components unmount or when switching between models:
1
2
3
4
5
6
7
8
// Cancel animations
if (animationFrameIdRef.current) {
    cancelAnimationFrame(animationFrameIdRef.current);
}

if (animationRef.current) {
    cancelAnimationFrame(animationRef.current);
}
This prevents unnecessary rendering operations and helps maintain optimal performance.
5. Context Loss Handling
The WebGL context is properly handled during cleanup:
1
2
3
4
5
// Dispose of renderer
if (rendererRef.current) {
    rendererRef.current.dispose();
    rendererRef.current.forceContextLoss();
}
This forceful context loss ensures proper GPU resource cleanup, preventing resource leaks in the graphics system.
Performance Optimization
Render Loop
The render loop is a critical component for a 3D visualization tool, directly impacting performance and responsiveness. StructViz3D implements an optimized render loop with several performance-enhancing techniques:
1. Efficient Animation Loop
The main render loop uses requestAnimationFrame for optimal performance and battery efficiency:
1
2
3
4
5
6
7
const animate = () => {
    animationFrameIdRef.current = requestAnimationFrame(animate);
    if (controlsRef.current) controlsRef.current.update();
    if (rendererRef.current && sceneRef.current && currentCameraRef.current) {
        rendererRef.current.render(sceneRef.current, currentCameraRef.current);
    }
};
This implementation ensures rendering is synced with the browser’s refresh rate and paused when the tab is inactive, optimizing resource usage.
2. Conditional Rendering
Render operations are guarded by existence checks to prevent errors and unnecessary operations:
1
2
3
if (rendererRef.current && sceneRef.current && currentCameraRef.current) {
    rendererRef.current.render(sceneRef.current, currentCameraRef.current);
}
This pattern prevents render attempts when resources aren’t available, enhancing application stability.
3. Optimized Controls Update
Control updates are conditionally performed only when the controls exist:
1
if (controlsRef.current) controlsRef.current.update();
This prevents unnecessary function calls and potential errors when controls haven’t been initialized yet.
4. Renderer Configuration
The WebGL renderer is configured for optimal performance:
1
2
3
4
5
6
7
8
9
10
11
12
const renderer = new THREE.WebGLRenderer({
    antialias: true,
    alpha: true,
    preserveDrawingBuffer: true
});
renderer.setSize(container.clientWidth, container.clientHeight);
renderer.setPixelRatio(window.devicePixelRatio);
renderer.outputColorSpace = THREE.SRGBColorSpace;
renderer.shadowMap.enabled = true;
renderer.shadowMap.type = THREE.PCFSoftShadowMap;
renderer.toneMapping = THREE.ACESFilmicToneMapping;
renderer.toneMappingExposure = 1.2;
This configuration balances visual quality and performance, with options like antialias for smooth edges and PCFSoftShadowMap for better shadow quality at a reasonable performance cost.
5. Camera Damping
The OrbitControls are configured with damping for smoother camera movement:
1
2
3
4
const controls = new OrbitControls(perspCamera, renderer.domElement);
controls.enableDamping = true;
controls.dampingFactor = 0.25;
// Additional control settings...
This creates a more natural, inertia-based camera movement that improves user experience while requiring continual updates in the render loop.
Geometry Management
Efficient geometry management is essential for maintaining high performance with complex 3D models. StructViz3D implements several strategies for optimal geometry handling:
1. Model Scaling and Centering
Models are automatically scaled and centered for optimal viewing:
1
2
3
4
5
6
7
8
9
10
11
12
// Center model
const box = new THREE.Box3().setFromObject(model);
const center = box.getCenter(new THREE.Vector3());
model.position.set(-center.x, -center.y, -center.z);

// Scale model
const size = box.getSize(new THREE.Vector3());
const maxDim = Math.max(size.x, size.y, size.z);
if (maxDim > 0) {
    const scale = DEFAULT_SCALE_FACTOR / maxDim;
    modelGroup.scale.set(scale, scale, scale);
}
This ensures that models of varying sizes are displayed appropriately within the viewport, improving user experience and rendering efficiency.
2. Material Optimization
Materials are applied efficiently with optimized properties:
1
2
3
4
5
6
// Create material with optimized properties
const material = new THREE.MeshStandardMaterial({
    color: new THREE.Color(modelColor),
    roughness: 0.7,
    metalness: 0.3
});
Using MeshStandardMaterial with carefully selected roughness and metalness values provides a good balance between visual quality and performance.
3. Hierarchy Management
Models are organized within a group structure for efficient transformations:
1
2
3
4
5
// Create and add group
const modelGroup = new THREE.Group();
scene.add(modelGroup);
modelGroup.add(model);
modelGroupRef.current = modelGroup;
This hierarchical approach allows for efficient application of transformations (like scaling and rotation) to the entire model at once.
4. Bounding Box Calculations
Bounding boxes are used for various optimizations:
1
2
3
const box = new THREE.Box3().setFromObject(model);
const size = box.getSize(new THREE.Vector3());
const maxDim = Math.max(size.x, size.y, size.z);
This information is used for scaling, centering, and determining optimal camera positions, improving rendering efficiency and user experience.
5. Wireframe Optimization
Wireframe mode is implemented with optimization considerations:
1
2
3
4
5
6
7
8
9
10
11
12
13
14
15
16
17
18
19
20
21
22
23
24
25
26
27
28
const toggleWireframe = useCallback(() => {
    const newWireframeState = !isWireframe;
    setIsWireframe(newWireframeState);

    if (modelRef.current) {
        modelRef.current.traverse((child) => {
            if (child.isMesh) {
                if (Array.isArray(child.material)) {
                    child.material.forEach(material => {
                        material.wireframe = newWireframeState;
                        if (newWireframeState) {
                            material.wireframeLinewidth = 2;
                            material.wireframeLinecap = 'round';
                            material.wireframeLinejoin = 'round';
                        }
                    });
                } else if (child.material) {
                    child.material.wireframe = newWireframeState;
                    if (newWireframeState) {
                        child.material.wireframeLinewidth = 2;
                        child.material.wireframeLinecap = 'round';
                        child.material.wireframeLinejoin = 'round';
                    }
                }
            }
        });
    }
}, [isWireframe]);
Rather than creating new geometries for wireframe display, the application toggles the wireframe property on existing materials, which is more efficient for memory usage and performance.
Responsive Design
StructViz3D is built with responsiveness in mind, ensuring a consistent experience across different devices and screen sizes:
1. Responsive Container
The application adapts to container dimensions, making it suitable for various layout contexts:
1
2
3
4
5
6
7
8
9
10
11
12
13
14
15
16
17
18
19
20
21
22
23
24
25
26
27
28
29
30
31
const handleResize = useCallback(() => {
    if (!container || !rendererRef.current) return;

    const width = container.clientWidth;
    const height = container.clientHeight;
    const aspect = width / height;

    rendererRef.current.setSize(width, height);

    // Update perspective camera
    if (perspectiveCameraRef.current) {
        perspectiveCameraRef.current.aspect = aspect;
        perspectiveCameraRef.current.updateProjectionMatrix();
    }

    // Update orthographic camera
    if (orthographicCameraRef.current) {
        const frustumSize = 10;
        orthographicCameraRef.current.left = frustumSize * aspect / -2;
        orthographicCameraRef.current.right = frustumSize * aspect / 2;
        orthographicCameraRef.current.top = frustumSize / 2;
        orthographicCameraRef.current.bottom = frustumSize / -2;
        orthographicCameraRef.current.updateProjectionMatrix();
    }

    // Update camera manager with current model size if possible
    if (modelRef.current) {
        const modelSize = getModelSize();
        cameraStateManager.updateModelSize(modelSize);
    }
}, [container, getModelSize]);
This resize handler ensures that the renderer, cameras, and controls all adapt appropriately to size changes, maintaining proper aspect ratios and display quality.
2. Device Pixel Ratio Handling
The application accounts for device pixel ratio to ensure crisp rendering on high-DPI displays:
1
renderer.setPixelRatio(window.devicePixelRatio);
This adjustment ensures optimal visual quality on displays with varying pixel densities, such as Retina displays on Apple devices.
3. Adaptive Controls
The application provides different control schemes optimized for various input methods:
1
2
3
4
5
controls.mouseButtons = {
    LEFT: THREE.MOUSE.ROTATE,
    MIDDLE: THREE.MOUSE.DOLLY,
    RIGHT: THREE.MOUSE.PAN
};
This configuration provides intuitive controls for mouse-based interaction, while the application also supports touch interactions for mobile devices through OrbitControls’ built-in touch support.
4. UI Adaptation
The user interface adapts to different screen sizes:
1
2
3
4
5
6
7
8
9
10
{!controlsVisible && (
    <div
        className="controls-indicator"
        onClick={() => setControlsVisible(true)}
        style=
        title="Show controls"
    >
        {/* Icon SVG */}
    </div>
)}
This pattern of collapsible controls allows the application to maintain usability on smaller screens where space is limited.
5. Fullscreen Support
The application provides fullscreen capability for an immersive experience:
1
2
3
const toggleFullscreen = useCallback(() => {
    ViewerControlsUtils.toggleFullscreen(container, setIsFullscreen);
}, [container]);
This feature allows users to maximize screen real estate for model visualization, particularly valuable on mobile devices.
Advanced Features
Fullscreen Mode
StructViz3D implements a robust fullscreen mode to provide an immersive visualization experience:
1. Fullscreen Toggle
The application uses the Fullscreen API for cross-browser compatibility:
1
2
3
4
5
6
7
8
9
10
// Utility function in ViewerControlsUtils
toggleFullscreen(container, setIsFullscreen) {
    if (!document.fullscreenElement) {
        container.requestFullscreen().catch(err => {
            console.error(`Error attempting to enable fullscreen: ${err.message}`);
        });
    } else {
        document.exitFullscreen();
    }
}
This implementation attempts to enter fullscreen mode and provides error handling for cases where fullscreen might be restricted.
2. Fullscreen State Tracking
The application tracks the fullscreen state to update the UI accordingly:
1
2
3
4
5
// Fullscreen change listener
const fullscreenChangeHandler = () => {
    setIsFullscreen(!!document.fullscreenElement);
};
document.addEventListener('fullscreenchange', fullscreenChangeHandler);
This ensures that UI elements like the fullscreen toggle button display the correct state.
3. Responsive Fullscreen Adaptation
When entering fullscreen mode, the application adapts to the new dimensions:
1
2
// The resize handler is triggered when entering/exiting fullscreen
window.addEventListener('resize', handleResize);
This ensures that the render context, camera properties, and UI layout all adjust appropriately to the fullscreen dimensions.
4. Fullscreen Button UI
The fullscreen toggle is presented with intuitive iconography:
1
2
3
4
5
6
7
<button
    onClick={toggleFullscreen}
    className="control-button"
    title={isFullscreen ? "Exit fullscreen" : "Enter fullscreen"}
>
    {isFullscreen ? <Minimize size={20} /> : <Maximize size={20} />}
</button>
This provides users with clear visual feedback about the current fullscreen state and the action that will be taken when clicking the button.
View Presets
StructViz3D provides predefined view presets to help users quickly navigate to standard viewing angles:
1. View Manager Implementation
The application includes a dedicated view manager for handling preset views:
1
2
// ViewManager initialization
viewManager.initialize(cameraStateManager, getModelSize);
This manager coordinates between camera positioning and model characteristics to ensure optimal views.
2. Standard View Presets
The application includes common engineering views:
1
2
3
4
5
6
7
8
9
10
// In ViewControls component
<div className="view-presets">
    <button onClick={() => handleViewPreset('front')} title="Front View">Front</button>
    <button onClick={() => handleViewPreset('back')} title="Back View">Back</button>
    <button onClick={() => handleViewPreset('left')} title="Left View">Left</button>
    <button onClick={() => handleViewPreset('right')} title="Right View">Right</button>
    <button onClick={() => handleViewPreset('top')} title="Top View">Top</button>
    <button onClick={() => handleViewPreset('bottom')} title="Bottom View">Bottom</button>
    <button onClick={() => handleViewPreset('isometric')} title="Isometric View">Iso</button>
</div>
These standard views (front, back, left, right, top, bottom, isometric) allow users to quickly examine models from conventional engineering perspectives.
3. Optimal Initial View
The application automatically determines the best initial view for each model:
1
2
3
4
5
6
7
8
9
10
const setOptimalInitialView = useCallback((model) => {
    if (!model || !cameraRef.current || !controlsRef.current || initialPositionSet) {
        return;
    }

    const success = viewManager.setOptimalInitialView(model, cameraRef.current, controlsRef.current);
    if (success) {
        setInitialPositionSet(true);
    }
}, [initialPositionSet]);
This ensures that models are displayed with good visibility immediately upon loading, improving user experience.
4. Smooth View Transitions
View changes include smooth animations for better spatial orientation:
1
2
3
4
5
6
7
8
// In ViewManager implementation
animateToPosition(targetPosition, targetLookAt) {
    const startPosition = currentCameraRef.current.position.clone();
    const startTarget = controlsRef.current.target.clone();

    // Animation logic with easing functions
    // ...
}
These animations help users maintain context when switching between views, enhancing the spatial understanding of the model.
Error Handling
StructViz3D implements comprehensive error handling to ensure robustness and usability:
1. Loading Error Handling
The application provides clear feedback for model loading errors:
1
2
3
4
5
6
7
8
9
10
11
12
13
14
15
16
17
18
loadSTLModel(
    modelUrl,
    scene,
    (model) => {
        setOptimalInitialView(model);
        setLoading(false);
        if (typeof onLoad === 'function') onLoad();
    },
    (xhr) => {
        const progress = xhr.total ? (xhr.loaded / xhr.total) * 100 : 0;
        console.log(`${progress.toFixed(2)}% loaded`);
    },
    (error) => {
        console.error('Error loading model:', error);
        setError('Failed to load the model. Please try again.');
        setLoading(false);
    }
);
This pattern ensures that loading errors are caught, logged, and presented to the user with actionable information.
2. UI Error States
Error states are clearly communicated in the UI:
1
2
3
4
5
{error && (
    <div className="error-message">
        <p>{error}</p>
    </div>
)}
This provides users with immediate visibility into problems and helps them understand what went wrong.
3. Resource Existence Checks
Operations on Three.js resources include existence checks to prevent errors:
1
2
3
if (rendererRef.current && sceneRef.current && currentCameraRef.current) {
    rendererRef.current.render(sceneRef.current, currentCameraRef.current);
}
This defensive programming approach prevents runtime errors that could occur if resources are accessed before they’re fully initialized.
4. Error Boundaries
Though not explicitly shown in the provided code, React error boundaries should be implemented at appropriate component levels to prevent entire application crashes due to rendering errors.
5. API Error Handling
API interactions include error handling:
1
2
3
4
5
6
7
8
9
// Inside model loader
loader.load(
    // ...
    (error) => {
        console.error('Error loading model:', error);
        setError('Failed to load the model. Please try again.');
        setLoading(false);
    }
);
This ensures that network issues or server problems are properly handled and communicated to the user.
Extension Points
StructViz3D is designed with extensibility in mind, providing several points for future enhancements:
1. Modular Architecture
The application uses a component-based architecture that facilitates the addition of new features:
1
2
3
4
5
6
7
8
<ViewerControls>
    <ColorSelector />
    <CameraControls />
    <ViewControls />
    <GridControls />
    <OrientationControls />
    <WireframeControls />
</ViewerControls>
This pattern allows new control components to be added without modifying existing functionality.
2. Manager Pattern
The application uses manager classes to encapsulate complex functionality:
1
2
3
// Example manager usage
viewManager.initialize(cameraStateManager, getModelSize);
lightsRef.current = lightingManager.setupLighting(scene);
This pattern provides clean interfaces for extending functionality in areas like lighting, camera control, and view management.
3. Callback Props
Components accept callback functions for customizing behavior:
1
2
3
4
5
<ModelViewer
    modelUrl={modelUrl}
    binUrl={binUrl}
    onLoad={() => setIsLoading(false)}
/>
This pattern allows parent components to hook into key lifecycle events without modifying the component itself.
4. Custom Event Handlers
The application implements custom event handlers that can be extended:
1
2
3
4
5
6
7
8
const handleZoom = useCallback((event) => {
    event.preventDefault();

    if (!controlsRef.current || !currentCameraRef.current || !container) return;

    // Custom zoom logic
    // ...
}, [container]);
This approach allows for sophisticated interactions that can be enhanced or modified in future versions.
5. Plugin Architecture
While not explicitly implemented, the modular design lends itself to a plugin architecture where additional features could be loaded dynamically.
Developer Guide
Component Structure
StructViz3D follows a hierarchical component structure for maintainability and separation of concerns:
1. Main Application (App.jsx)
The root component that manages the overall application state and navigation:
1
2
3
4
5
6
7
8
9
10
11
12
13
14
15
16
17
18
19
20
21
22
23
24
25
26
27
function App() {
    const [modelUrl, setModelUrl] = useState(null);
    const [binUrl, setBinUrl] = useState(null);
    const [isLoading, setIsLoading] = useState(false);
    const [showUploadScreen, setShowUploadScreen] = useState(true);

    // Event handlers and state management

    return (
        <div className="App">
            {showUploadScreen ? (
                <div className="upload-screen">
                    {/* Upload UI components */}
                </div>
            ) : (
                <div className="viewer-screen">
                    {/* Viewer UI components */}
                    <ModelViewer
                        modelUrl={modelUrl}
                        binUrl={binUrl}
                        onLoad={() => setIsLoading(false)}
                    />
                </div>
            )}
        </div>
    );
}
This component handles the main application flow, switching between the upload and viewer interfaces.
2. ModelViewer Component
The core component for 3D visualization:
1
2
3
4
5
6
7
8
9
10
11
12
13
14
15
16
17
18
19
20
21
22
const ModelViewer = ({ modelUrl, binUrl, onLoad }) => {
    // State and refs for Three.js objects

    // Three.js initialization and cleanup

    // Event handlers for user interactions

    return (
        <div className="model-viewer-wrapper">
            <div ref={setContainer} className="model-viewer-container" />

            {/* Controls and UI overlays */}
            {!loading && !error && modelUrl && (
                <ViewerControls>
                    {/* Control components */}
                </ViewerControls>
            )}

            {/* Status indicators */}
        </div>
    );
};
This component encapsulates the Three.js integration and provides the main rendering functionality.
3. Control Components
Specialized components for different control functions:
ColorSelector- For model color customizationCameraControls- For switching between perspective and orthographic modesViewControls- For preset views and camera positioningGridControls- For grid display optionsOrientationControls- For model orientationWireframeControls- For wireframe display optionsLightingControls- For lighting adjustments
4. Utility Managers
Specialized classes for complex functionality:
viewManager- Handles view presets and camera positioningcameraStateManager- Manages camera modes and stateslightingManager- Handles lighting setup and configurationEnhancedWireframeMode- Provides advanced wireframe visualization